National Geographic Rock Tumbler Instructions PDF: A Comprehensive Guide
Unlock the secrets to transforming rough rocks into gleaming gemstones! This guide provides a detailed, easy-to-follow PDF resource for your National Geographic tumbler, ensuring polished results.
Understanding Your Rock Tumbler Kit
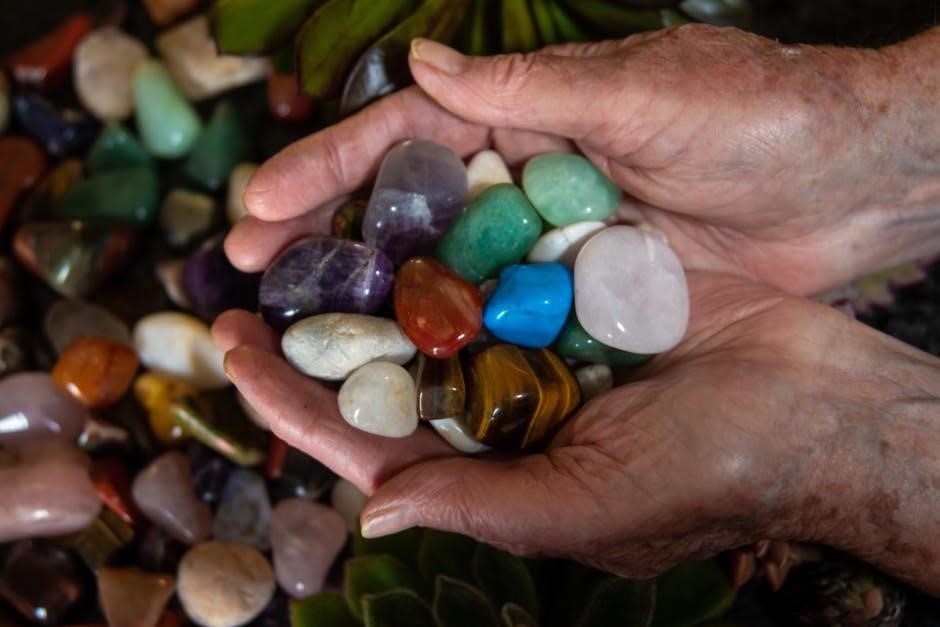
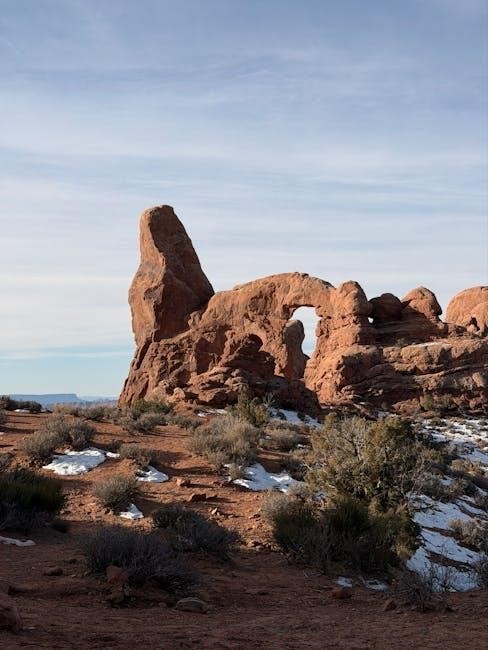
Your National Geographic Rock Tumbler kit is a gateway to the fascinating world of geology and lapidary! This kit isn’t just a toy; it’s a STEM activity designed to educate and inspire. It allows you to replicate a natural process that takes millennia – the smoothing and polishing of rocks by water and sediment – in a matter of weeks.
The kit typically includes a rotary tumbler, a barrel (the drum where the rocks are tumbled), and a selection of grit powders in varying coarseness. These grits are crucial, acting as abrasive agents to shape, smooth, and ultimately polish your chosen rocks. Understanding the purpose of each component is key to success. The tumbler’s motor provides the rotational force, while the barrel creates a contained environment for the tumbling action.
Familiarize yourself with the different parts before beginning. Knowing what each piece does will help you troubleshoot any issues and maximize your rock-tumbling experience. This kit offers a hands-on learning experience, fostering patience and an appreciation for the Earth’s natural beauty.
Kit Contents and Identification
Let’s inventory your National Geographic Rock Tumbler kit! A typical kit includes a robust rotary tumbler motor unit, designed for consistent rotation. You’ll find a durable plastic barrel – this is where the magic happens! Crucially, the kit contains four stages of grit: coarse, medium, fine, and polish. Each grit is specifically formulated for a particular stage of the tumbling process.
Alongside the grits, expect a bottle of rock polish compound, essential for achieving that final, brilliant shine. Many kits also include a sample assortment of rough rocks, providing immediate material for your first tumbling projects. A detailed instruction manual (often available as a PDF download) guides you through each step.
Carefully identify each component. The grit containers are clearly labeled with their grit size. Ensure you have all listed items before starting. Missing parts can hinder your progress. Familiarizing yourself with each element now will streamline the tumbling process and ensure optimal results.
Safety Precautions Before You Begin
Prioritize safety when operating your National Geographic Rock Tumbler! Always wear safety glasses to protect your eyes from potential rock fragments or splashes. The tumbler motor contains electrical components; keep it away from water and ensure a dry operating environment. Never attempt to disassemble the motor while it’s plugged in.
Grit and polish compounds are abrasive. Avoid inhaling dust – work in a well-ventilated area or wear a dust mask. Skin contact should also be minimized; use gloves if necessary. Keep the tumbler out of reach of children and pets. The rotating barrel can pose a hazard.
Inspect the barrel for cracks before each use. A damaged barrel could shatter during operation. Never overfill the barrel – leave adequate space for the rocks and grit to tumble freely. Finally, always unplug the tumbler before cleaning or performing any maintenance. Following these precautions ensures a safe and enjoyable rock tumbling experience.
Stage 1: Coarse Grit – Shaping the Rocks
Stage 1 utilizes coarse grit to remove rough edges and begin shaping your rocks. This is the longest stage, typically lasting between 7-10 days, depending on the hardness and initial shape of your stones. The grit acts as an abrasive, gradually wearing down the rocks through tumbling action.
A proper grit-to-rock ratio is crucial – generally, use 2-3 tablespoons of coarse grit per pound of rocks. Ensure the barrel is approximately 2/3 to 3/4 full of rocks and grit, with enough water to cover everything. Regularly check the water level, adding more if needed to maintain a slurry consistency.
During this stage, you’ll hear a distinct grinding sound. This is normal! The goal is to round off sharp corners and create a consistent shape. Patience is key; don’t interrupt the process prematurely. A thorough Stage 1 sets the foundation for successful polishing in subsequent stages.
Preparing the Rocks for Stage 1
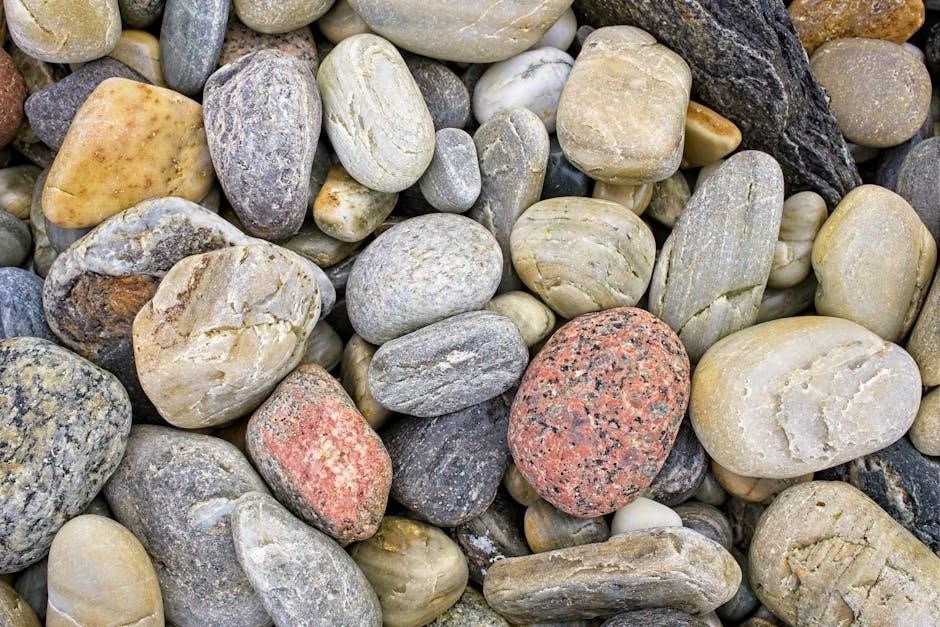
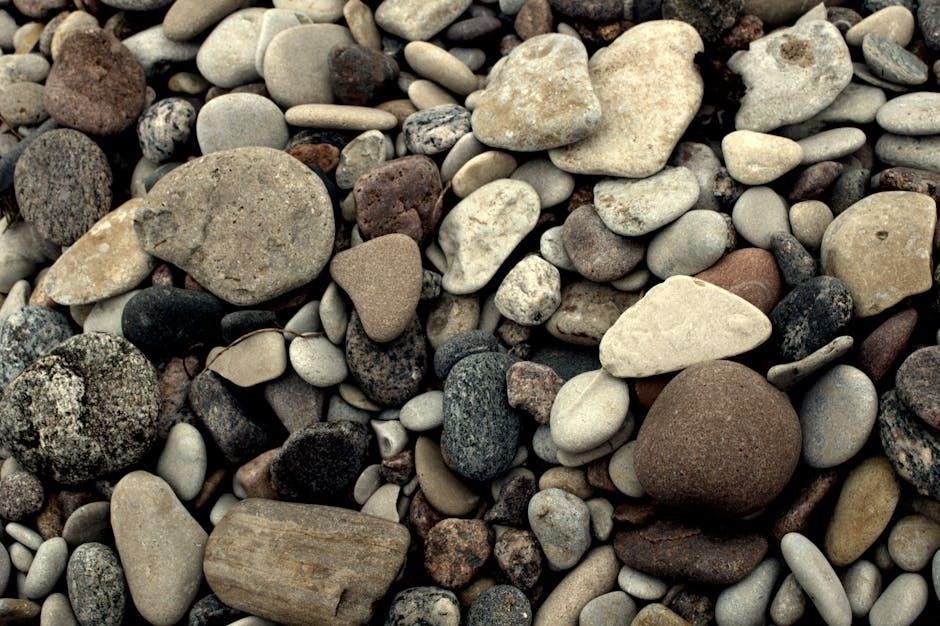
Before commencing Stage 1, careful rock preparation is essential for optimal results. Begin by thoroughly washing your rocks with soap and water to remove any dirt, clay, or loose debris. Inspect each rock, discarding any that are too soft or fragile, as they may disintegrate during tumbling.
Rocks should be roughly the same hardness to tumble effectively. A mix of very hard and very soft rocks will lead to uneven wear. Break larger rocks into smaller, manageable pieces – approximately ¾ inch in size is ideal. This ensures consistent abrasion and prevents damage to the tumbler barrel.
Remove any existing paint or coatings from the rocks. Finally, pre-soaking the rocks in water for 24 hours can help saturate them, reducing dust during the initial grinding phase. Proper preparation minimizes contamination and maximizes the efficiency of the coarse grit.
Loading the Barrel Correctly
Proper barrel loading is crucial for effective tumbling. Fill the barrel approximately 2/3 to 3/4 full with rocks – this provides sufficient space for abrasion without overcrowding. Add the specified amount of coarse grit (Stage 1) according to the instructions, typically 4-6 tablespoons, ensuring it coats the rocks evenly.
Next, add water to just below the top layer of rocks. Avoid overfilling, as this can hinder the tumbling action. A small amount of water is key; too much will reduce the grinding efficiency. Finally, add plastic pellets (ceramic media) to further cushion the rocks and improve tumbling action.
These pellets help distribute the grit and prevent rocks from clumping. Secure the barrel lid tightly, ensuring a waterproof seal. Remember, correct loading maximizes contact between rocks and grit, leading to smoother, more polished stones.
Stage 1 Duration and Grit Ratio
Stage 1, utilizing coarse grit, is the longest and most impactful phase. Typically, this stage requires 7-10 days of continuous tumbling. The ideal grit ratio is approximately 4-6 tablespoons of coarse grit per pound of rocks, ensuring sufficient abrasive action. Regularly check the water level during this period, adding small amounts as needed to maintain consistent coverage.
The barrel should rotate continuously for optimal results. Avoid interrupting the process unless absolutely necessary. The goal of Stage 1 is to shape the rocks, removing sharp edges and creating a foundation for subsequent smoothing. Monitor the rocks’ progress; if shaping is slow, a slightly higher grit ratio may be considered.
However, avoid excessive grit, as it can hinder cleaning between stages. Patience is key – Stage 1 sets the stage for a beautiful polish!
Stage 2: Medium Grit – Smoothing the Edges
Following Stage 1, Stage 2 focuses on smoothing the rock surfaces. This phase utilizes medium grit, removing the scratches left by the coarse grit and preparing the rocks for finer polishing. A typical duration for Stage 2 is 5-7 days of continuous tumbling, though it can vary based on the initial rock condition.
The recommended grit ratio is around 4 tablespoons of medium grit per pound of rocks. Maintaining the correct water level is crucial; add water as needed to ensure the grit effectively coats all surfaces. Inspect the rocks periodically – a smooth, even texture indicates progress.
Proper completion of Stage 2 is vital for achieving a high-quality polish in later stages. Don’t rush this process; thorough smoothing minimizes imperfections and maximizes shine.
Cleaning the Rocks Between Stages
Thorough cleaning between each grit stage is absolutely essential for optimal results. Residual grit from the previous stage will contaminate the next, hindering the smoothing and polishing processes. After Stage 1, 2, and 3, carefully remove all rocks from the barrel.
Rinse the rocks under running water, using a strainer to prevent loss. Scrub each rock individually with an old toothbrush to dislodge any embedded grit. Inspect closely for remaining particles. Simultaneously, clean the tumbler barrel meticulously, removing all traces of the used grit.
A clean barrel and thoroughly washed rocks guarantee that each stage operates with pure grit, maximizing its effectiveness. Skipping this step will compromise the final polish and potentially damage the tumbler.
Stage 2 Grit Type and Usage
Stage 2 utilizes medium grit, typically silicon carbide, to further smooth the rocks after the initial shaping in Stage 1. This grit removes the scratches left by the coarse grit, preparing the stones for finer polishing stages. The National Geographic kit usually includes a specific medium grit, clearly labeled for this purpose.
Carefully measure the correct amount of medium grit according to the instructions – usually a tablespoon per pound of rocks. Add the grit to the barrel along with the cleaned rocks and sufficient water to reach the appropriate level. Ensure the water covers the rocks, but doesn’t overfill the barrel.
The medium grit’s abrasive action refines the rock surfaces, removing imperfections and creating a smoother texture. Proper usage is crucial for a successful transition to the pre-polish stage.
Stage 2 Duration and Monitoring
Stage 2, employing the medium grit, generally runs for 7 days, though consistent monitoring is key for optimal results. Regularly check the progress – around day 3 or 4 – by carefully removing a sample rock. Examine its smoothness; if significant scratches remain, continue tumbling.
Listen to the barrel; a quieter operation often indicates the grit is breaking down and nearing completion. However, relying solely on sound isn’t sufficient. Visual inspection is paramount. The slurry will become a greyish color as the grit breaks down and polishes the rocks.
Avoid opening the barrel frequently, as this disrupts the process. Document your observations to refine future tumbling sessions. A successful Stage 2 yields rocks with a uniformly smooth surface, ready for the finer grit in Stage 3.
Stage 3: Fine Grit – Pre-Polish
Stage 3 utilizes fine grit to prepare the rocks for the final polish, removing any remaining imperfections from the previous stages. This is a crucial step, as it significantly impacts the ultimate shine and clarity of your gemstones. Expect this stage to run for approximately 7 days, but diligent monitoring is essential.
The slurry during Stage 3 will appear milky white. Inspect a sample rock after around 5 days; it should exhibit a noticeable improvement in smoothness and a subtle sheen. If scratches persist, extend the tumbling time.
Maintaining absolute cleanliness is paramount in Stage 3. Any contamination from coarser grits will hinder the pre-polish. Thoroughly clean the barrel and rocks before proceeding, ensuring a pristine environment for optimal results.
Importance of Cleanliness in Stage 3
Maintaining impeccable cleanliness during Stage 3 is absolutely critical for achieving a professional-quality polish. Residual grit from Stages 1 and 2 will contaminate the fine grit slurry, creating microscopic scratches and dulling the final shine. Think of it as building a foundation – any flaws will be magnified in subsequent steps.
Before loading the barrel for Stage 3, meticulously rinse both the barrel itself and each individual rock. Use hot water and a dedicated brush to remove all traces of previous grit. Even a small amount of contamination can compromise the pre-polish process.
Consider using a separate set of tools (bucket, brush) solely for Stage 3 to prevent cross-contamination. A clean environment ensures the fine grit can effectively smooth and prepare the rocks for the final polishing stage, maximizing brilliance.
Stage 3 Grit Selection and Quantity
For Stage 3, the pre-polish stage, selecting the correct grit is paramount. Typically, a 600-grit silicon carbide is recommended for National Geographic tumblers, bridging the gap between smoothing and final polishing. This grit refines the surface, removing the finer scratches left by the medium grit.
The quantity of grit used is also crucial. A general guideline is to use approximately 2 tablespoons of 600-grit per pound of rocks. However, always refer to your specific kit’s instructions, as ratios can vary slightly. Insufficient grit won’t effectively pre-polish, while excessive grit can hinder the process.
Ensure the grit is fresh and hasn’t been contaminated with grit from previous stages. Proper grit selection and quantity contribute significantly to a successful and brilliant final polish.
Stage 3 Duration and Inspection
Stage 3, the pre-polish phase, typically requires 24 to 48 hours of tumbling time with the 600-grit. However, this duration isn’t fixed and depends on the hardness and initial condition of your rocks. Regular inspection is vital to assess progress.
After 24 hours, carefully inspect a few rocks. They should exhibit a noticeable improvement in smoothness, with a dull sheen emerging. If scratches are still prominent, continue tumbling for another 24 hours. Avoid opening the barrel frequently, as this introduces contaminants and disrupts the process.
A key indicator of readiness is the slurry’s consistency – it should be a milky grey. Thorough rinsing is essential before proceeding to Stage 4 to prevent grit carryover, which can damage the final polish. Patience during this stage yields superior results.
Stage 4: Polish – Achieving the Shine
Stage 4 is where your rocks truly transform! This final stage utilizes a polishing compound – typically aluminum oxide – to create a brilliant, glass-like shine. The duration generally ranges from 7 to 10 days, but consistent monitoring is crucial.
Choosing the right polish is paramount. National Geographic kits usually include a dedicated polishing compound. Avoid using other abrasives, as they can dull the finish. Ensure the barrel is meticulously clean before adding the polish and rocks.
Barrel speed should remain consistent with previous stages – typically a slow to medium rotation. Frequent inspection isn’t necessary, but after 7 days, check a few rocks. A high-gloss shine indicates completion. Remember, a clean tumbler and patience are key to achieving professional-quality results!
Choosing the Right Polish Compound
Selecting the correct polish is vital for achieving that stunning, high-gloss finish. National Geographic rock tumbler kits typically include a specifically formulated polishing compound, often aluminum oxide, designed for optimal results with the tumbler’s process.
Avoid substituting with other abrasives or compounds. Using incorrect materials can lead to a cloudy or scratched surface, negating the efforts of the previous stages. The included compound is calibrated to work with the grit sizes used earlier.
Ensure the polish is fresh and hasn’t absorbed moisture. A compromised compound won’t polish effectively. Follow the kit’s instructions regarding the quantity of polish to use – typically a tablespoon or two per barrel load. Proper selection guarantees a beautiful, professional-looking shine!
Stage 4 Duration and Barrel Speed
The final polishing stage demands patience and precise control. Typically, Stage 4, utilizing the polishing compound, requires a longer duration than previous stages – often 7 days, but always consult your National Geographic kit’s specific instructions.
Barrel speed is crucial during polishing. Most National Geographic tumblers operate at a consistent speed, but ensure yours is functioning correctly. Avoid excessive speed, as it can cause friction and heat, potentially damaging the polished surfaces.
Regularly check the rocks (after the initial 24-48 hours) to monitor progress. While a full week is standard, some batches may benefit from slightly longer. Remember, a thorough polish is the culmination of the entire process, so don’t rush it!
Troubleshooting Common Issues
Even with careful adherence to instructions, occasional problems can arise. Cloudy or dull rocks are frequent concerns, often stemming from insufficient cleaning between stages or contaminated grit. Ensure thorough rinsing and a clean barrel before each new stage.
Another common issue is uneven polishing. This can be caused by rocks of varying hardness or insufficient tumbling time. Consider adding plastic pellets to help distribute the polishing compound evenly and cushion the rocks.
If the tumbler is noisy or vibrates excessively, check that it’s on a level surface and the barrel is securely fastened. Always refer to the National Geographic PDF manual for specific troubleshooting steps related to your model. Patience and persistence are key to resolving these issues!
Addressing Cloudy or Dull Rocks
Cloudiness or a lack of shine often indicates incomplete polishing or contamination. The primary culprit is usually insufficient cleaning between grit stages. Thoroughly rinse the rocks and barrel with warm water, ensuring all traces of the previous grit are removed before proceeding.
Another factor is using old or contaminated polishing compound. Always use fresh polish for the final stage. If rocks remain dull after polishing, consider repeating Stage 4 with new compound and a slightly longer tumbling duration.
Harder rocks may require extended tumbling times. Inspect the rocks frequently and continue polishing until the desired shine is achieved. Refer to the National Geographic PDF manual for specific recommendations based on the rock types you are using.
Maintaining Your Rock Tumbler
Regular maintenance ensures the longevity and optimal performance of your National Geographic rock tumbler. After each use, thoroughly clean the barrel and all components with warm, soapy water. Remove any grit residue to prevent cross-contamination between stages;
Inspect the rubber barrel liner for wear and tear. Replace it if it’s cracked or damaged, as this can affect tumbling efficiency. Periodically lubricate the motor with a small amount of machine oil, following the instructions in the official PDF manual.
Avoid exposing the motor to excessive moisture. Store the tumbler in a dry place when not in use. Proper cleaning and lubrication will keep your tumbler running smoothly for years of rock polishing enjoyment.
Cleaning and Lubrication
Consistent cleaning and lubrication are vital for a long-lasting National Geographic rock tumbler. After each tumbling stage, meticulously wash the barrel, lid, and all internal parts with warm, soapy water. Ensure all traces of grit are removed to prevent contamination in subsequent stages.
For the motor, apply a few drops of machine oil to the rotating shaft. This minimizes friction and ensures smooth operation. Refer to the official PDF manual for specific lubrication points and recommended oil types. Avoid over-lubrication, as excess oil can attract dust and debris.
Regularly inspect the drive belt for wear. Replace if cracked or frayed. Proper maintenance guarantees efficient tumbling and extends the life of your rock tumbler.
Finding the Official National Geographic PDF Manual
Locating the official National Geographic Rock Tumbler Instructions PDF is crucial for optimal use. While not always directly available on the National Geographic website, several resources offer access. A comprehensive search using keywords like “National Geographic Rock Tumbler Manual PDF” will yield results.
Check online retailers where you purchased the kit. Many include a downloadable PDF link with their product listing. Alternatively, explore user manual databases and document-sharing websites. Be cautious when downloading from unfamiliar sources to avoid malware.
The JMW Sales, Inc. website often hosts manuals for NGHOBBYTUMBLER rock tumblers, which are frequently associated with National Geographic kits. Always verify the manual corresponds to your specific model number for accurate instructions.
Additional Resources and Support
Beyond the official PDF, a wealth of support exists for National Geographic Rock Tumbler enthusiasts. Online forums and communities dedicated to rock tumbling offer invaluable advice, troubleshooting tips, and shared experiences. These platforms allow you to connect with fellow hobbyists and learn from their successes and challenges.
YouTube channels feature numerous tutorials demonstrating each stage of the tumbling process, providing visual guidance. Websites specializing in lapidary arts also offer detailed articles and resources. Don’t hesitate to utilize these supplementary materials to enhance your understanding.
For specific product inquiries or issues, contacting National Geographic’s customer support may be helpful, though direct assistance with the tumbler itself might be limited. Remember to consult the community first – often, solutions are readily available from experienced users!